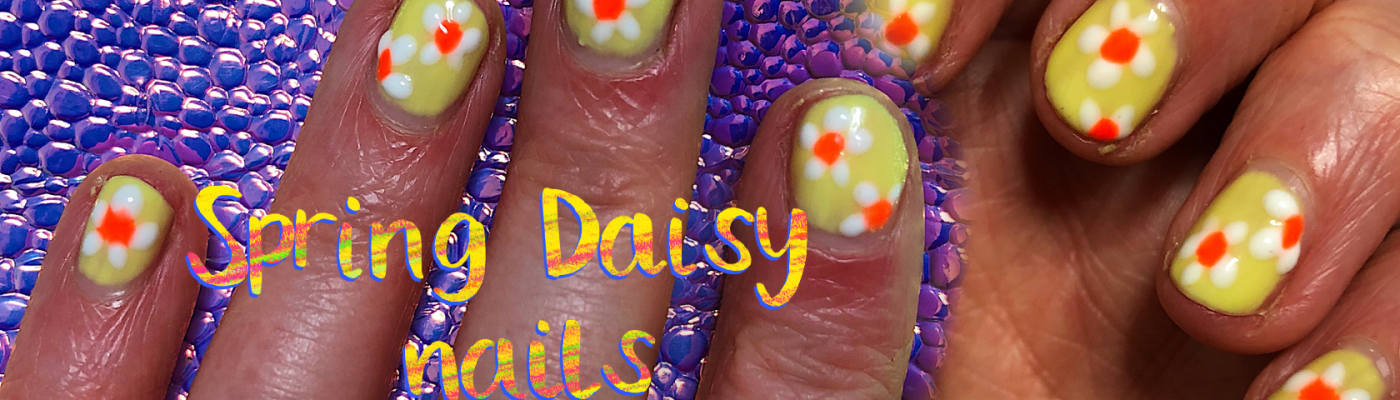
Do you ever fancy doing something a little different with your nails but don’t have the creative flare of all the amazing nail technicians you see on Instagram? Yeah, me too! I find that although I’m a creative person, working with nail varnish isn’t ideal. It quickly bleeds into other shades and when you’re trying to do the pattern on your non-dominant hand, well – you’re screwed.
I always find that the easiest patterns to do are daisys (flowers) and leopard print – maybe something I can show you another day. In this post, I show you how to create a super cute and super Spring-y nail tutorial. All you need is three colours of your choice – I went with yellow, neon orange and white – and a dotting tool. You can pick these up on eBay, usually in sets of about 5 nail brushes/tools for a couple of quid.
I did use gel varnish to create this look but you can easily do the same with normal varnish. You simply will have to wait between layers/dots for the nail varnish to dry before going in with your next step.
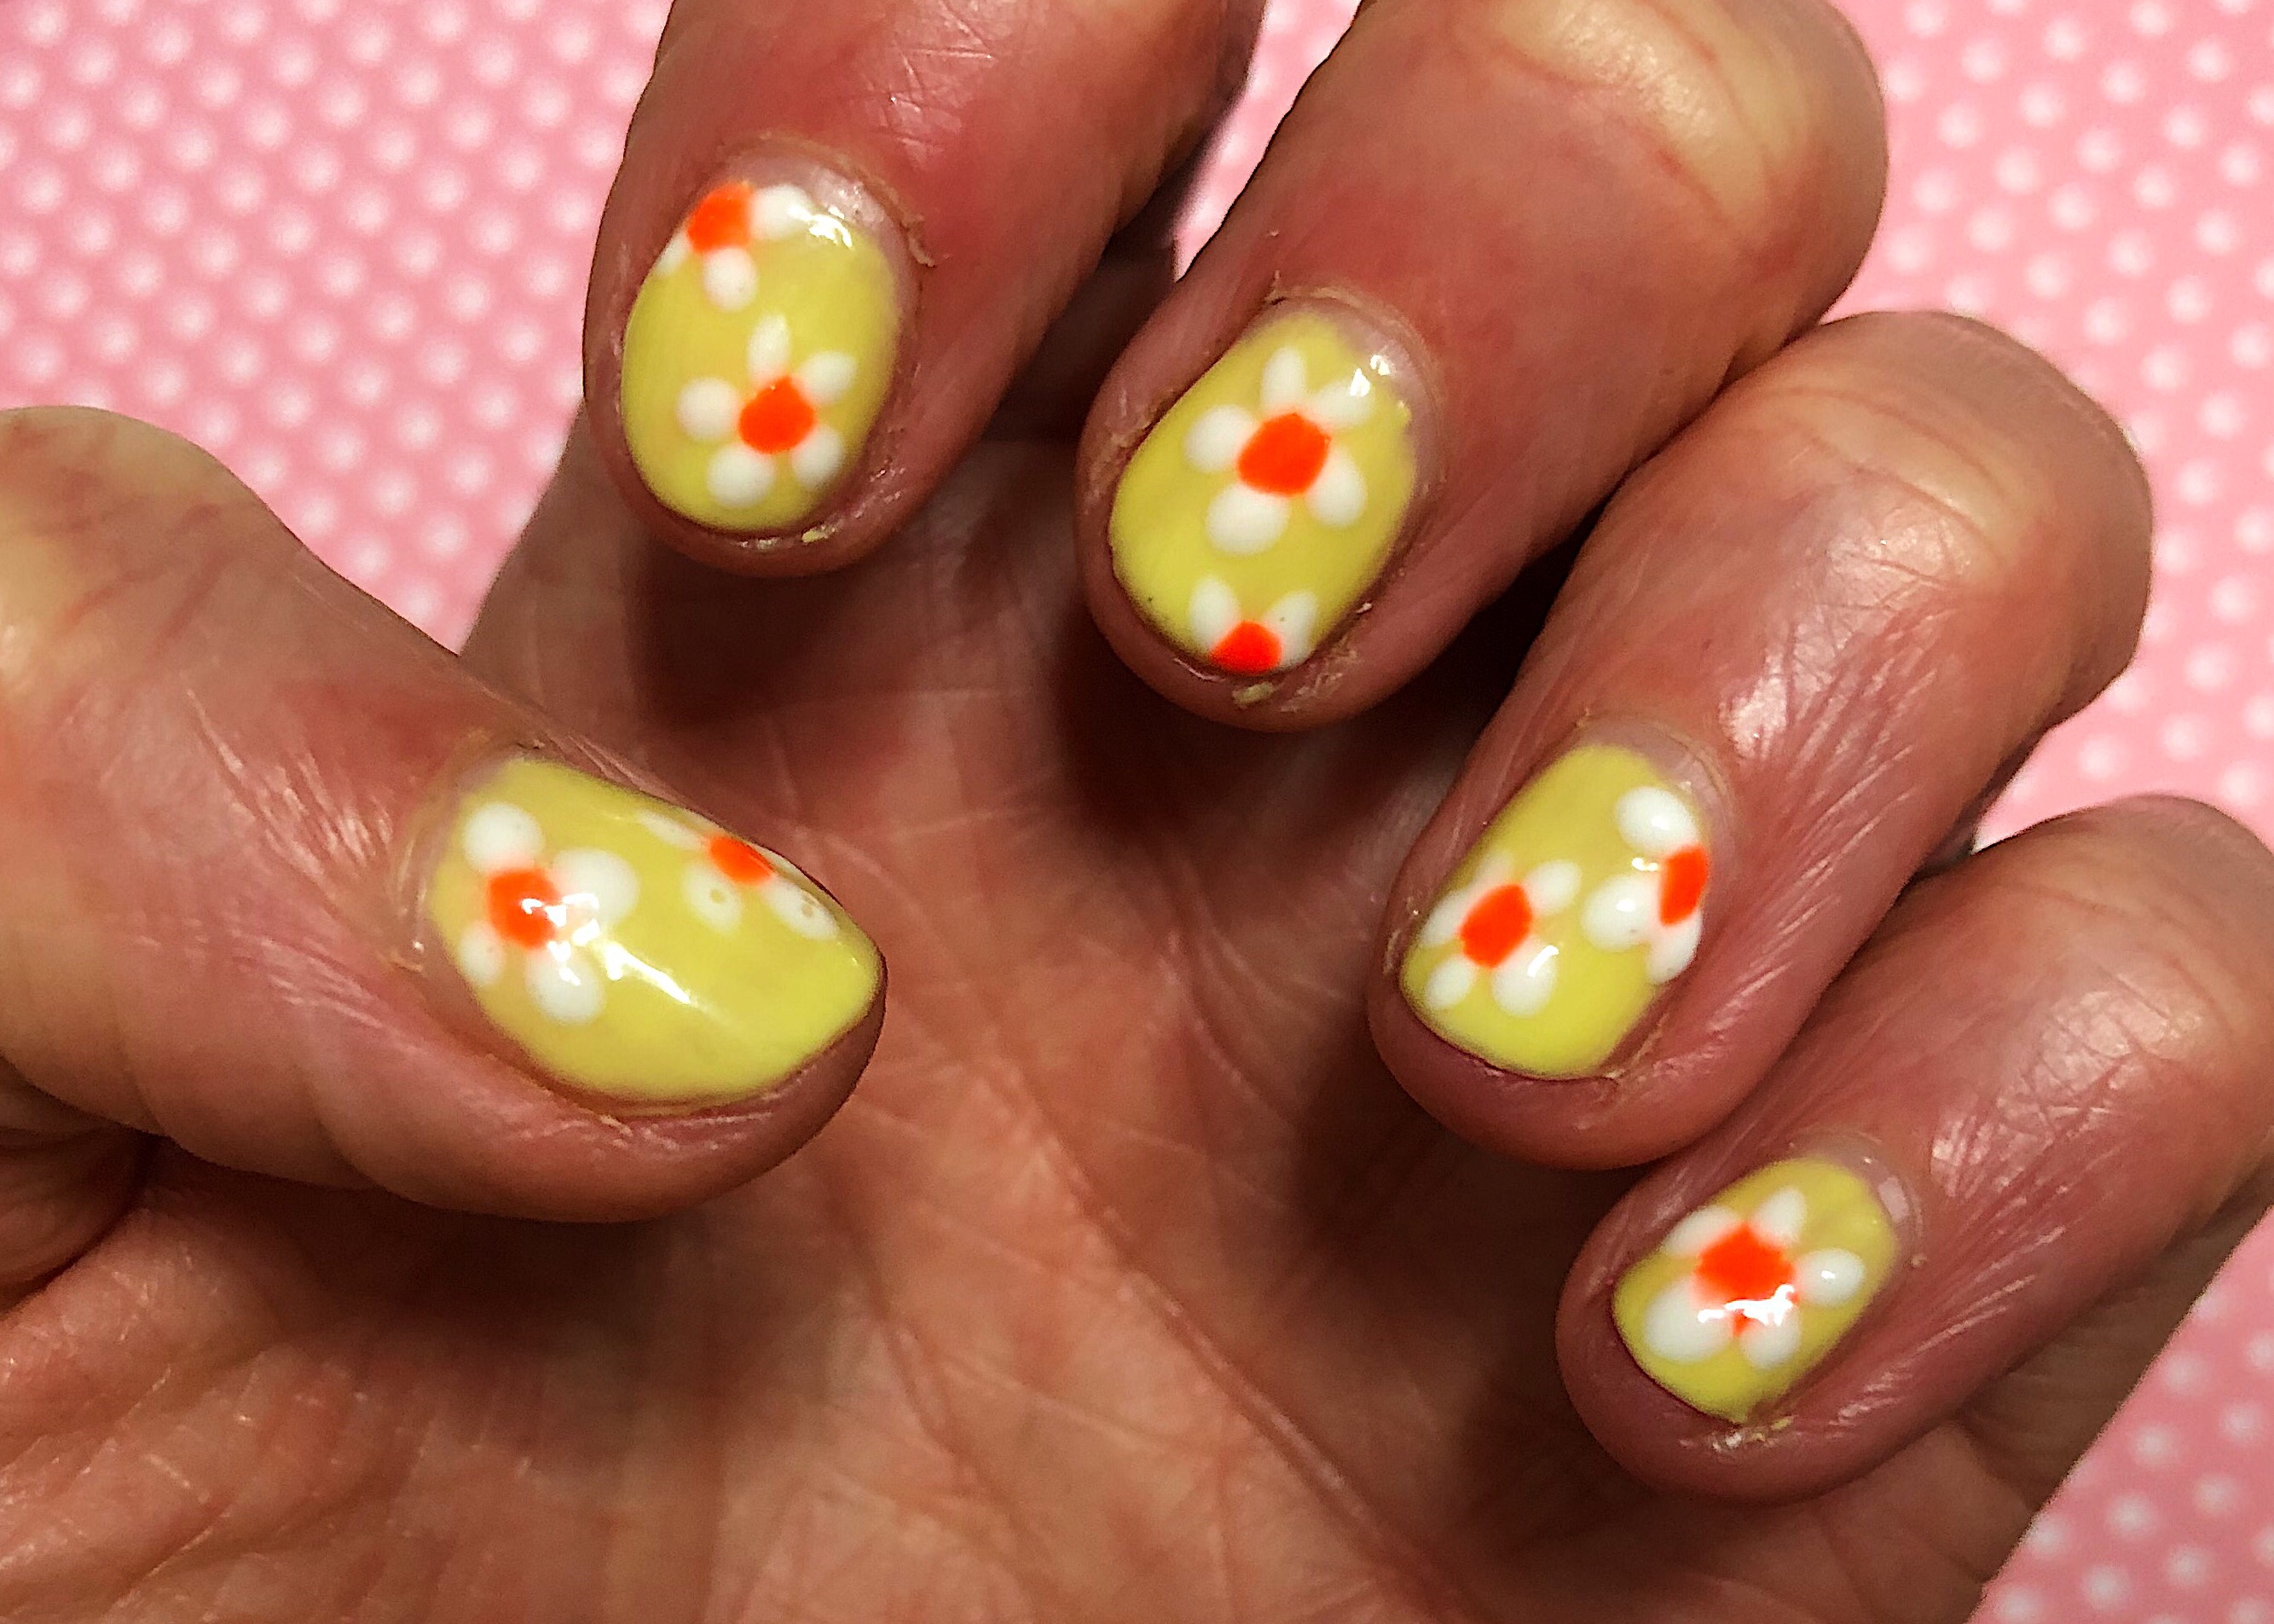
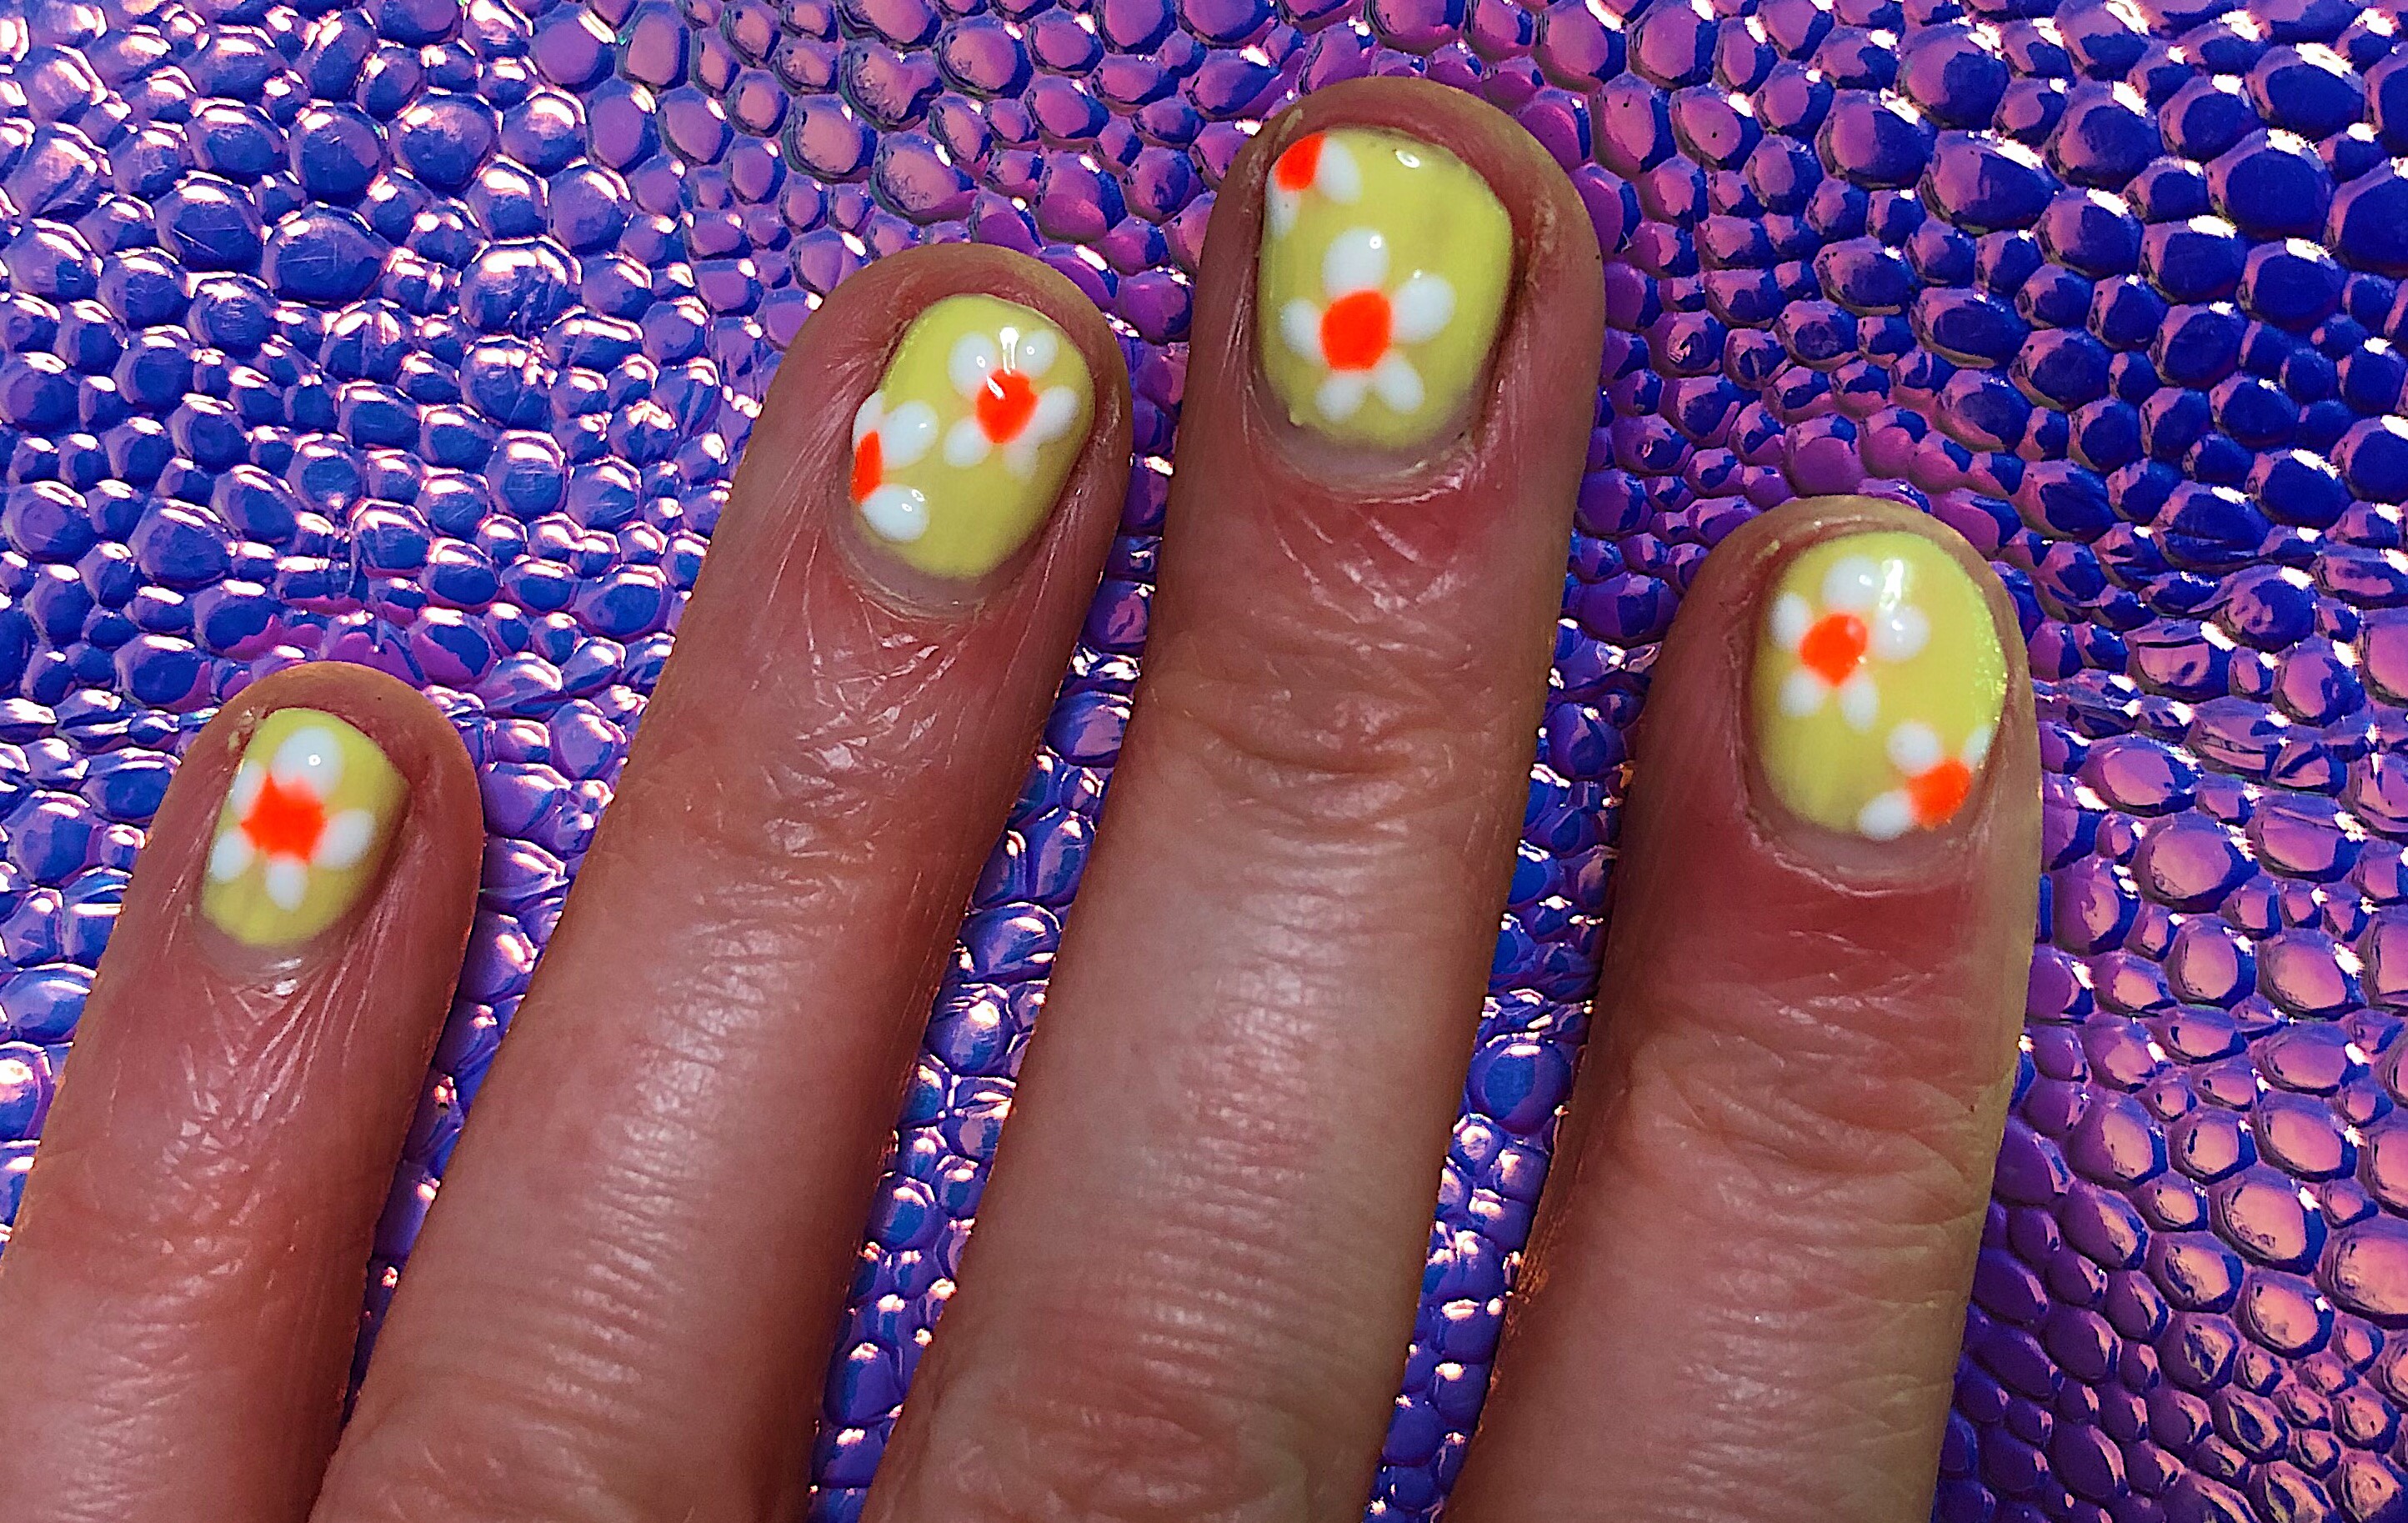
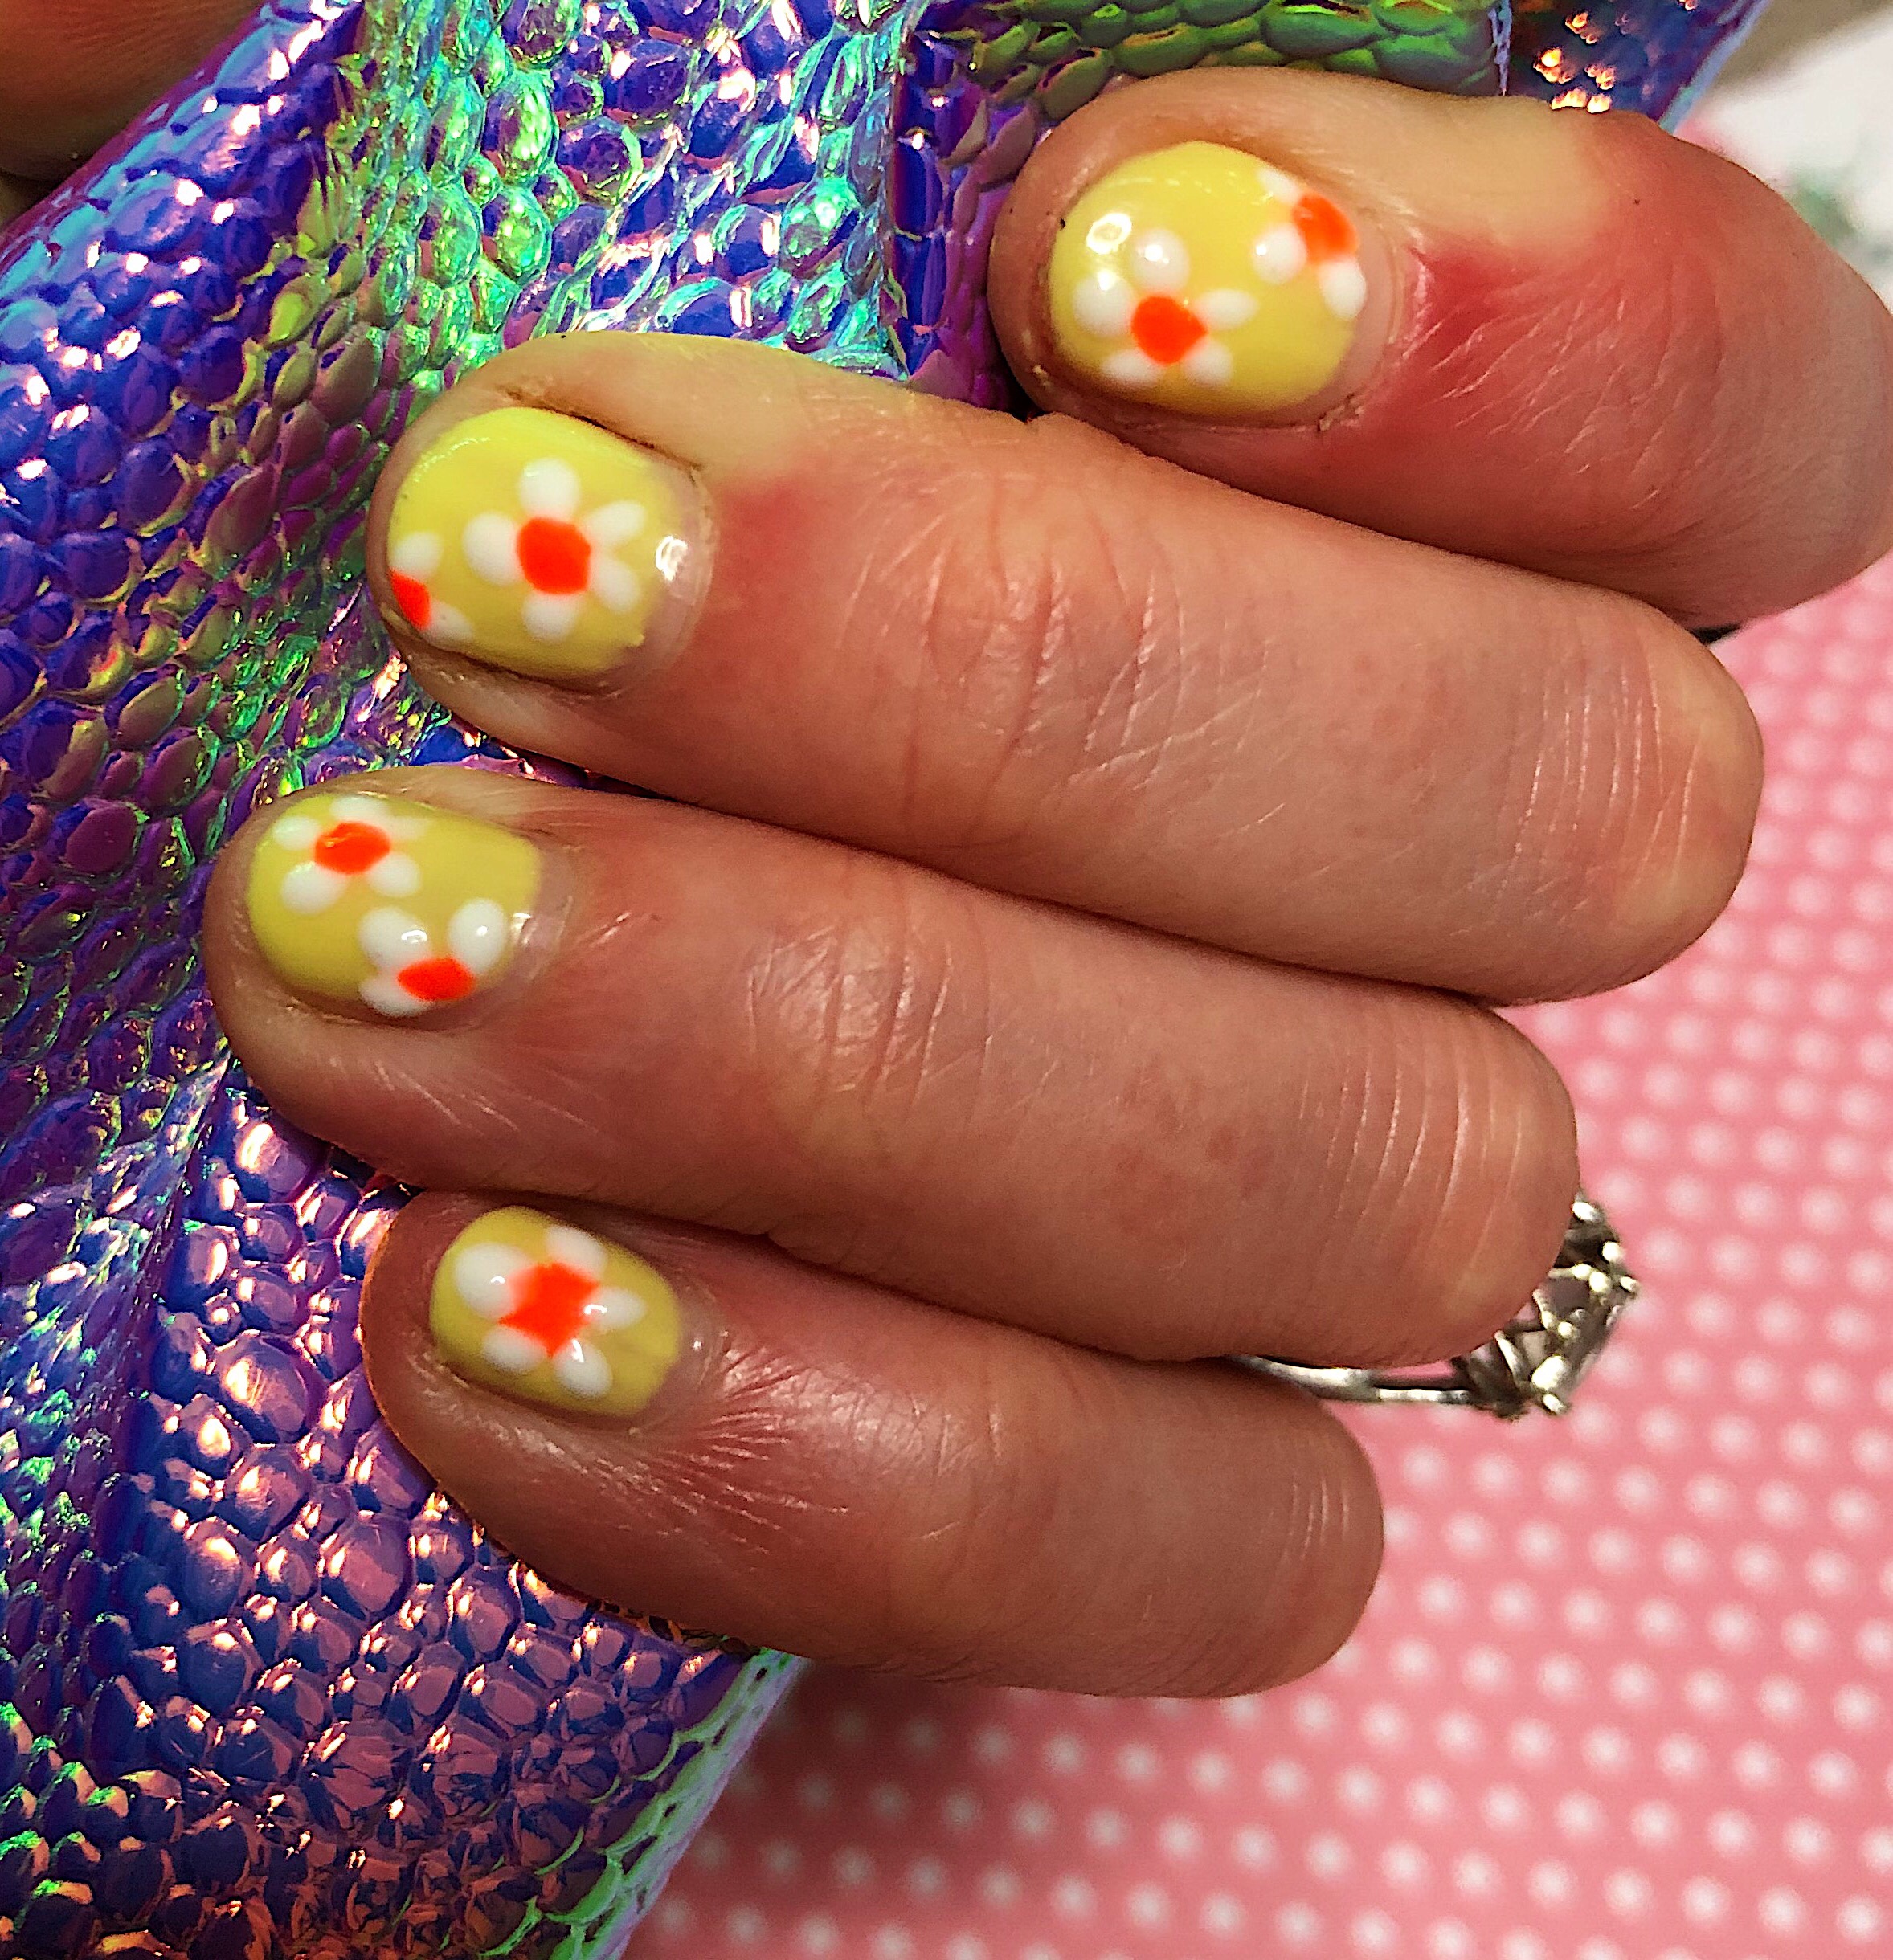
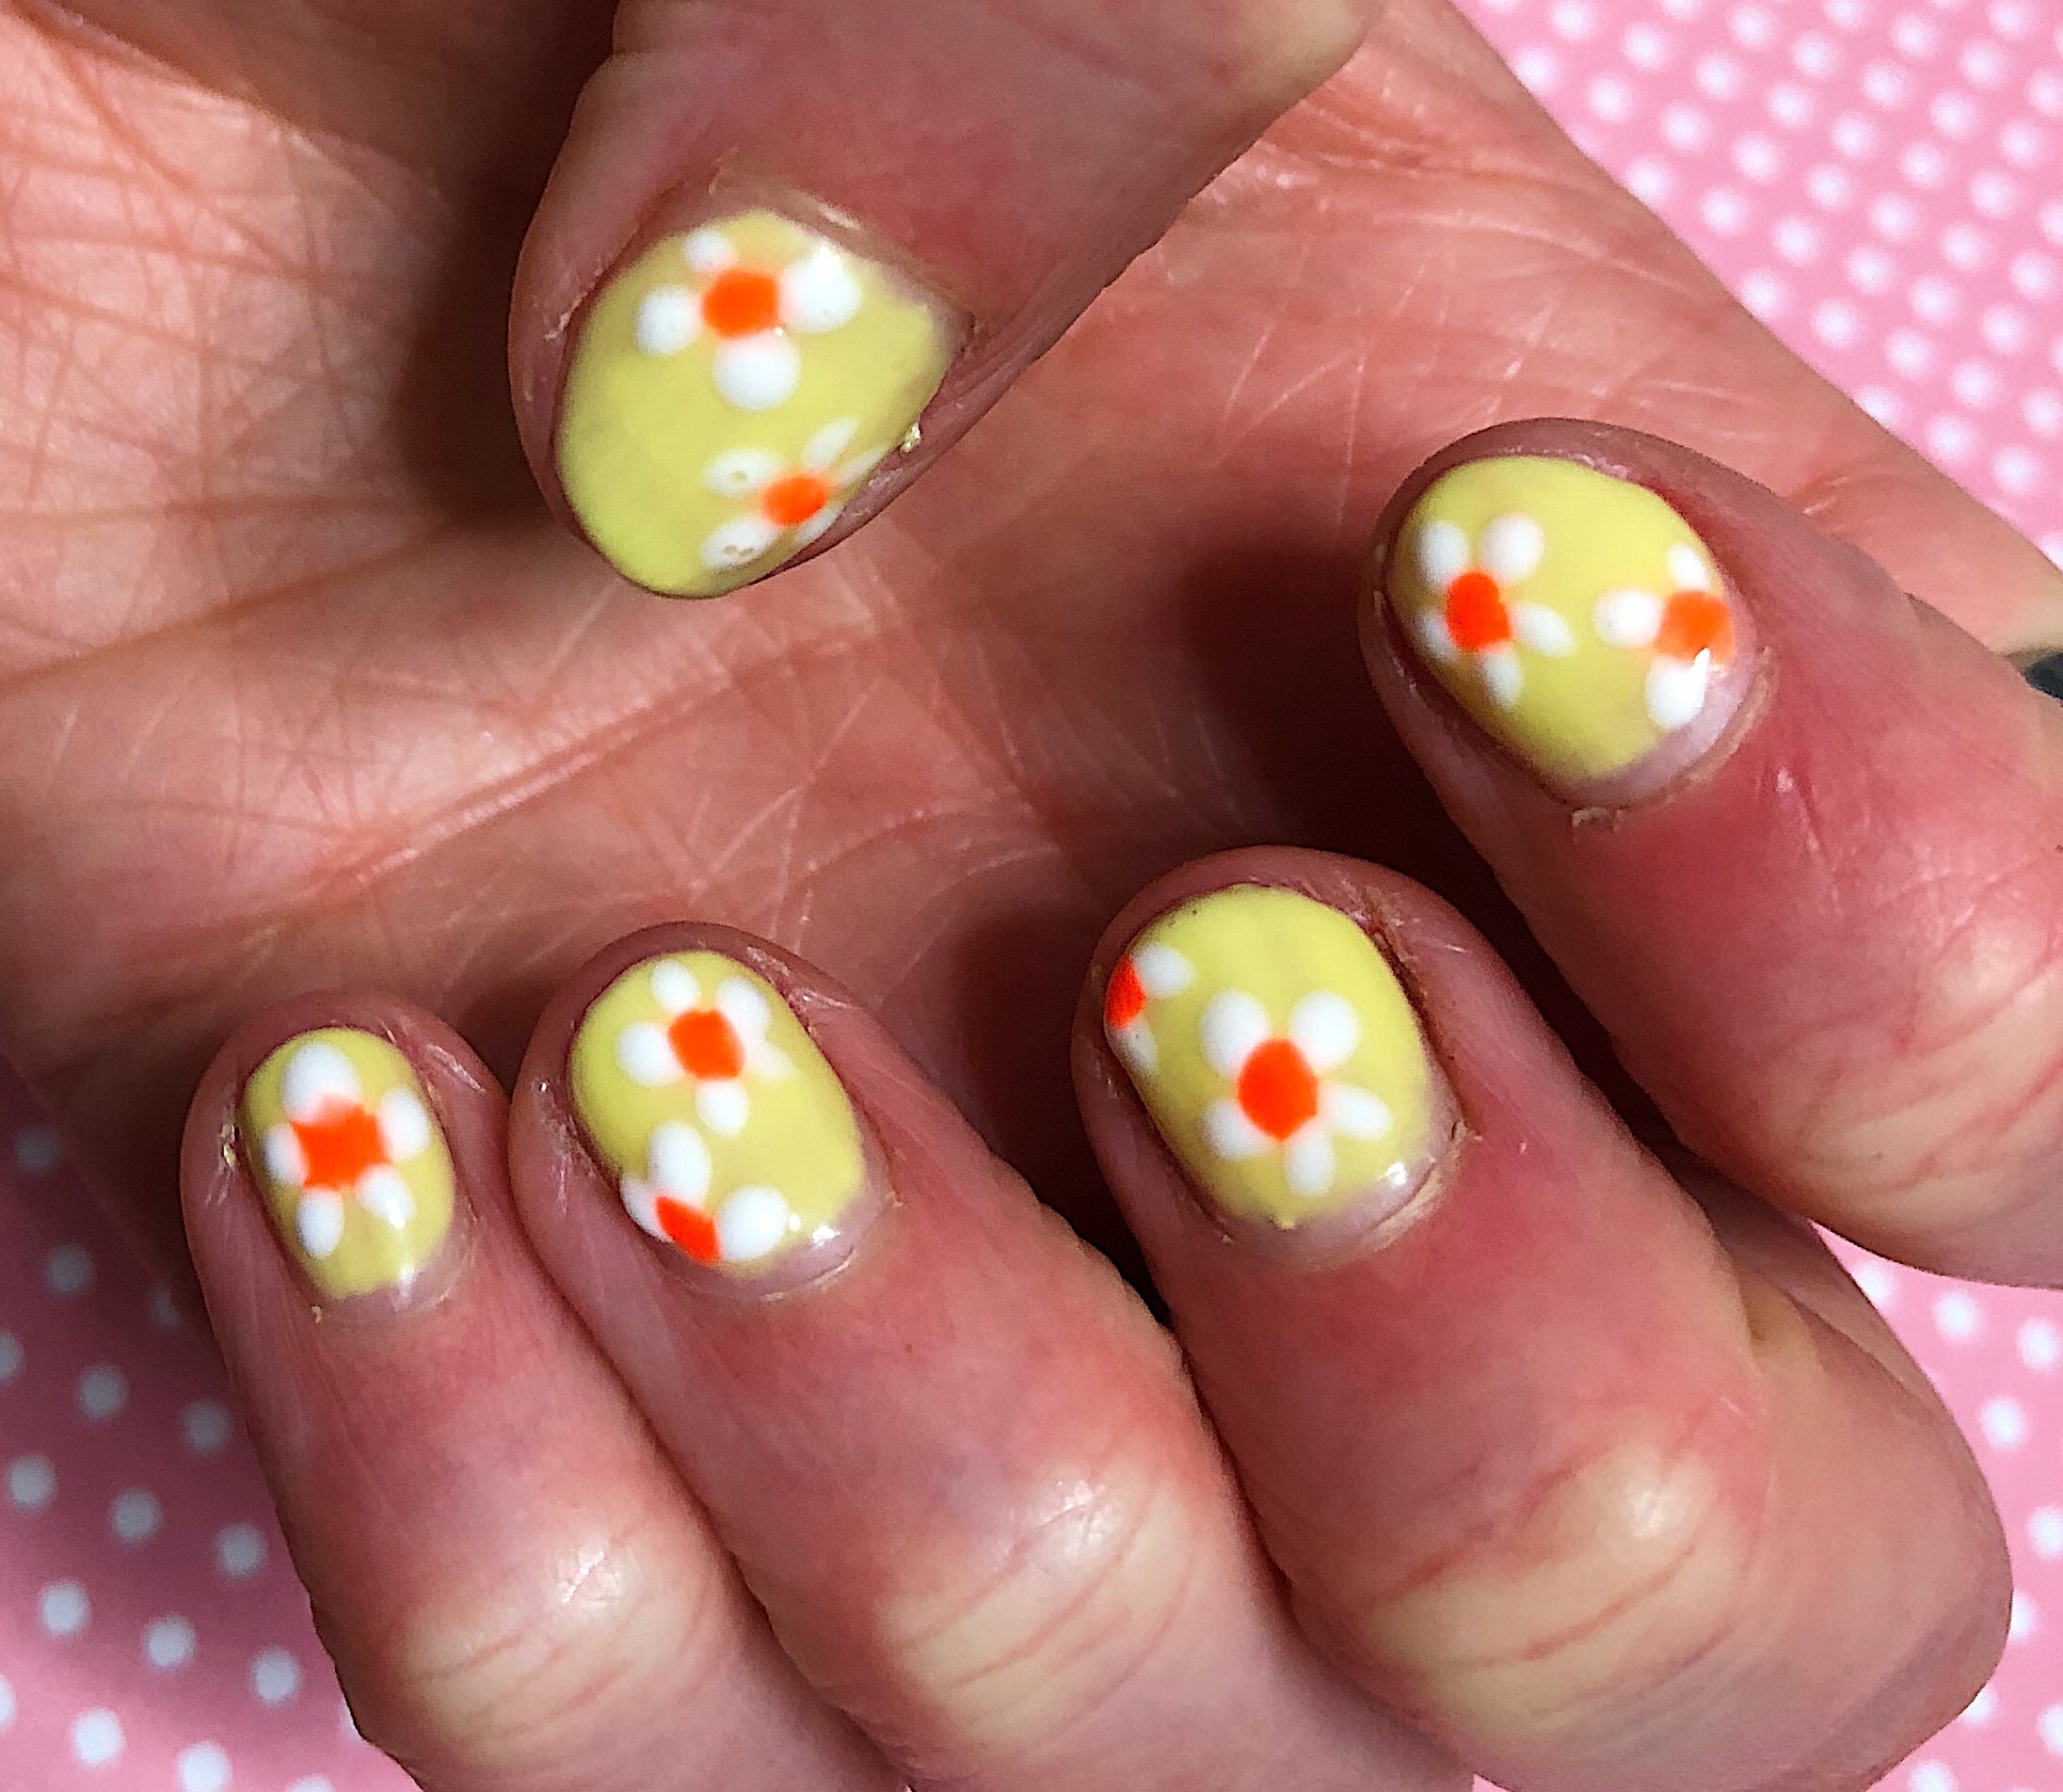
First things first, you need to get your base layer down. I used the shade Dizzy Daisy (£7.50, SensatioNAIL), apply three thin layers to get the opacity I wanted. The next thing you need to do is do the petals using the dotting tool. A similar one to the one I used is the white one from this 5 piece set (£1.99, eBay).
I took the shade Studio White gel polish (£6.50, Bluesky) and randomly dotted either 5 petals for a full flower, or a few petals if adding a flower off centre in the corner of the nail.
To create the inside of the daisy after the petals were cured, I used the shade Luminous Orange (£6.50, Bluesky) on the same dotting tool. Once all layers were cured, I added my top coat to give that extra shine and make the nails look smoother (as you can imagine the dots we’ve created do make bumps on the surface of the nail). My current top coat is by GDI (£5.80, eBay).
I’ve had a lot of compliments on the nails since I did them. I’ll be honest, they look a lot cuter further away, as the little bubbles the gel varnish has made aren’t as visible. After all, I’m no nail tech am I? I hope you try them out, different colours would look so cute I’m thinking blue petals with a pink centre on a green background would be super seasonal. I’d love to see if you give them a go and if you’d like more posts like this in the future, please be sure to let me know in the comments.
Love, always.
Becca-x


Please email any PR or business enquiries to beccapbeauty@hotmail.com

Thanks for the info
LikeLike
You’re welcome x
LikeLike
Your nails look amazing!
I don’t have the patience to wait for all that drying time, especially since I usually can’t even make it through the one color base without getting antsy and messing a nail up!
I wish I could be able to do this though. It looks so good!
LikeLike
If you’re using gel you only need to wait 30 seconds for it to cure – so it’s definitely worth looking into! Thanks for popping by though, it’s much appreciated x
LikeLike
Looks great!
LikeLike
Thanks Jess x
LikeLike
Welcome! xx
LikeLike